

GameArt Spotlight #28
"Ready for Action" by Michael Mik Fallik
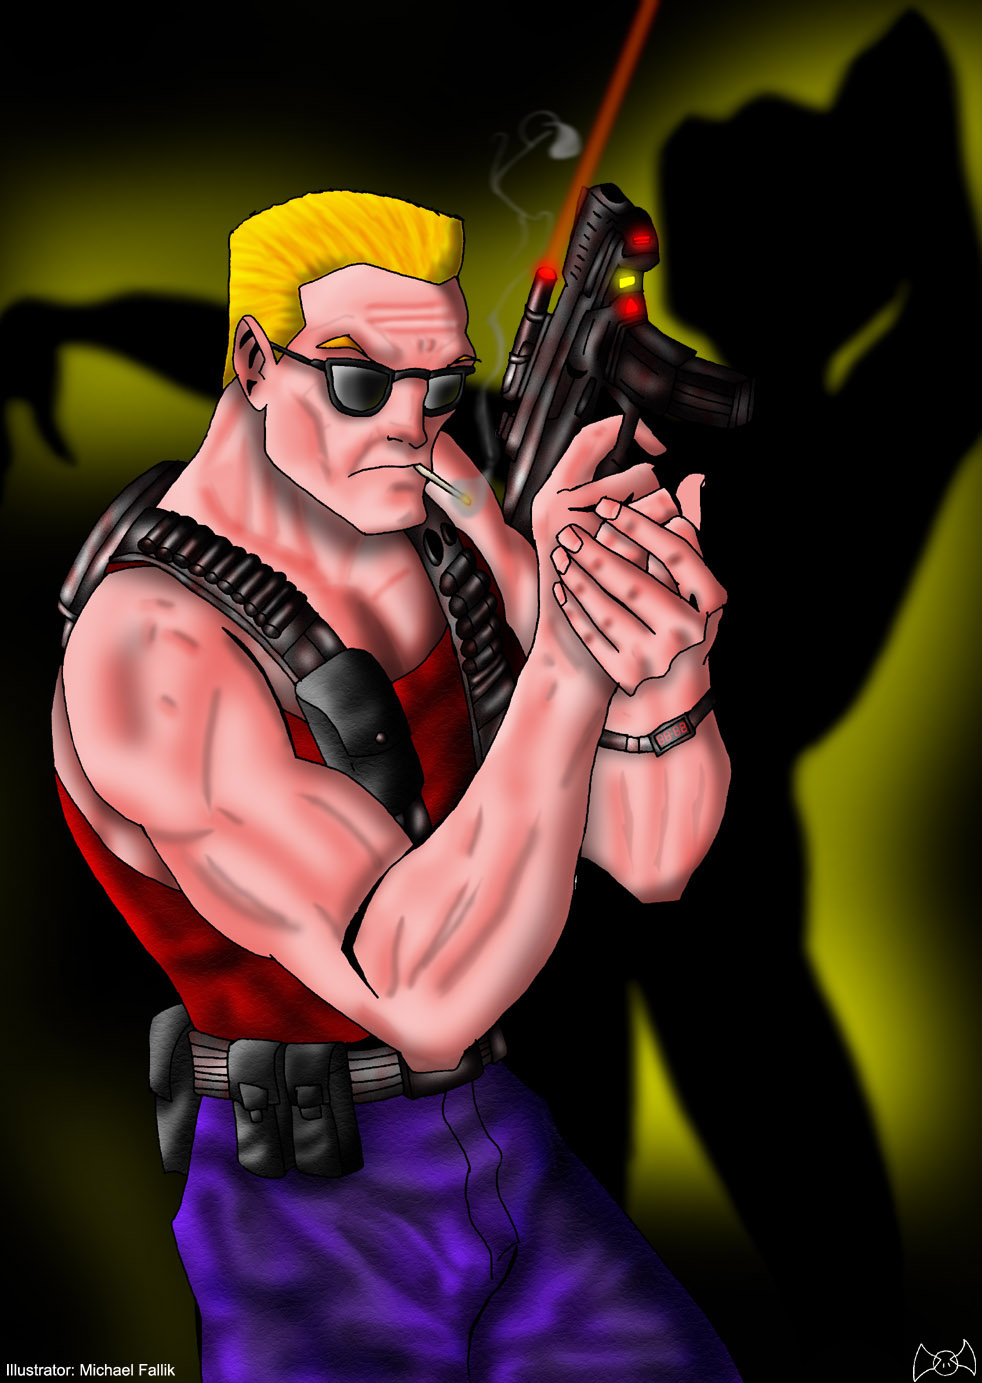
Image details
- Title: Ready for Action
- Gallery ID: 00650
- Artist name: Michael Mik Fallik
- Posting date: 1999-08-01 (a Sunday)
- Artist website: Unknown
- Tags: duke, nukem, 3D, nukem3D, duke4forever, the, duke, paintings, smoke, laser
- Image size: 37.43 KB
- Votes: 31
Please be sure to read the Copyright & Legal information text on the About & Help page.
Spotlight article
Yellow, my name is Michael "MIK" Fallik, I love video games and especially ones with cool characters in them. Duke (in my opinion) is one of the coolest characters ever made because of his unique personality.
I started out with the idea in my head and then sketched it down on a 24.5 x 34cm paper. First I drew the basic anatomy and then I fleshed it out until I had a semi-naked Duke (Obviously I didn't draw certain parts, hehe). Next I added Duke's clothes, and ammo belts. The gun was a tricky part, I drew the pistol from Duke Nukem 3D and then added more details to it, like the clip and the laser eye so the gun won't look too simple. Finally I added the sunglasses and the cigarette to give Duke an attitude.
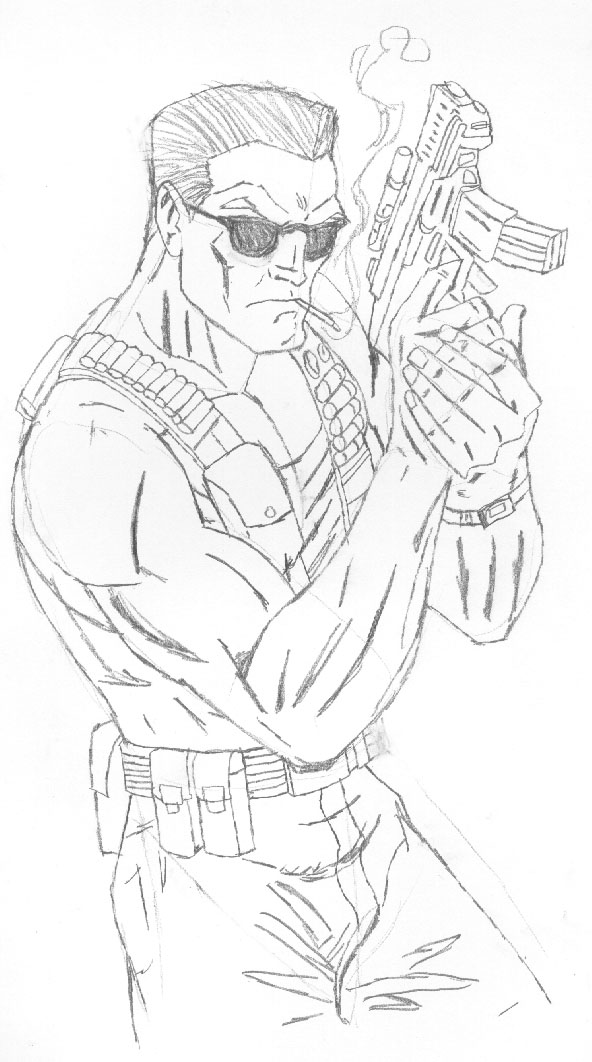
The next step was to ink the picture. I placed the picture on a light desk (a desk that projects light under the paper so you can see through it), and placed a regular A4 paper on top of it. I used a Pantone Tria pen to Ink this drawing on the A4 paper. During the inking, I redefined some of the lines and gave them some shading.
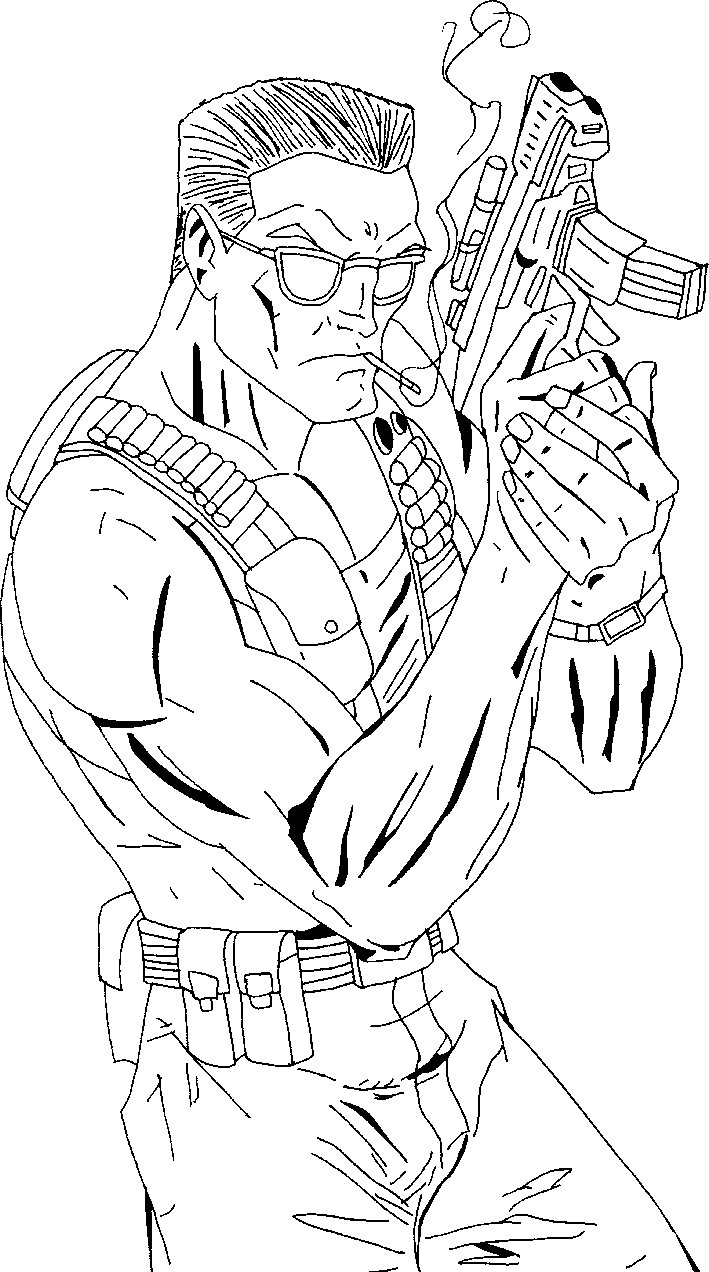
Step 3 was to scan the picture. Usually I scan my pictures on Grayscale mode in 600 DPI, I did the same for this one. Then I transferred the picture to Adobe Photoshop. Using the brightness/contrast option, I sharpened the lines until they were completely black. Then I reduced the picture to 300 DPI and transformed it into Bitmap mode. When all this was done, I transformed the picture to RGB mode.
Now Duke was ready to be colored! First things first I copied all the black lines to a new layer, then, on the bottom layer I used the fill tool to give Duke his basic colors. To do the shadows & highlights I used the Dodge/Burn tool and the smudge tool to give some of the shades a sharper edge. Since some of the facial and muscle marks were too bold, I cut them and pasted them in an above layer. Then I colored them in a slightly darker color than the background color, I blurred the lines and changed the layer opacity to 30%.
To color the metals (the gun and the ammo belts). I used a black & white air brush at 30% opacity. Then, I added noise to all the metals and added a slightly red shade to them. Finally I used the HSB noise filter from Eyecandy 3.0 to give the metals a rusty look. The sunglasses were also done with an airbrush.
The picture was colored and it was time to add the effects. I flattened the image and used and airbrush to do the lights from the gun. The laser-beam was done with the 50% opacity line tool on a new layer and was then blurred and merged down. Last, the smoke, was also copied to a new layer and was blurred. I then transformed the layer to 50% opacity and merged it down.

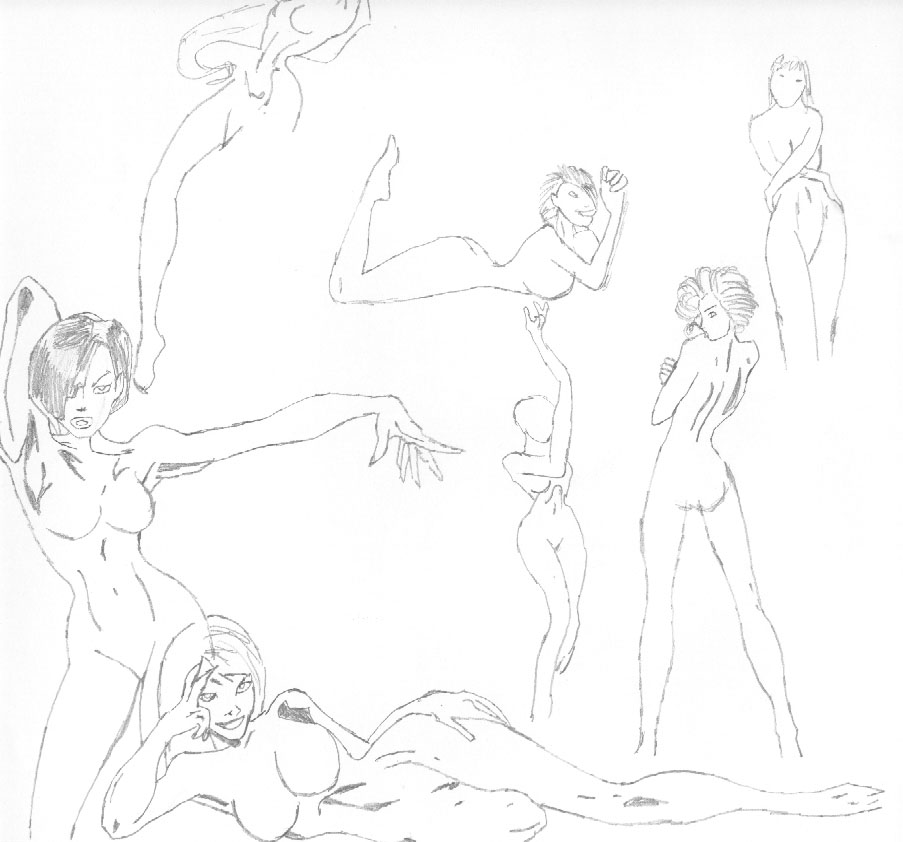
Duke was finished, but he still needed a background, and what's better than the famous pixilated strippers from E1L2! The Idea for the background came to me from the James Bond movies. I sketched a few females, inked them and then colored them black on the computer. Then I picked one of females and pasted her behind Duke. I did the spotlight with an airbrush and an airbrush eraser.
That's it. I hoped you enjoyed reading this spotlight as much as I enjoyed writing it.
Text written by Michael Mik Fallik for GameArt.com