

GameArt Spotlight #30
"Bio Gunner" by Marius Nita
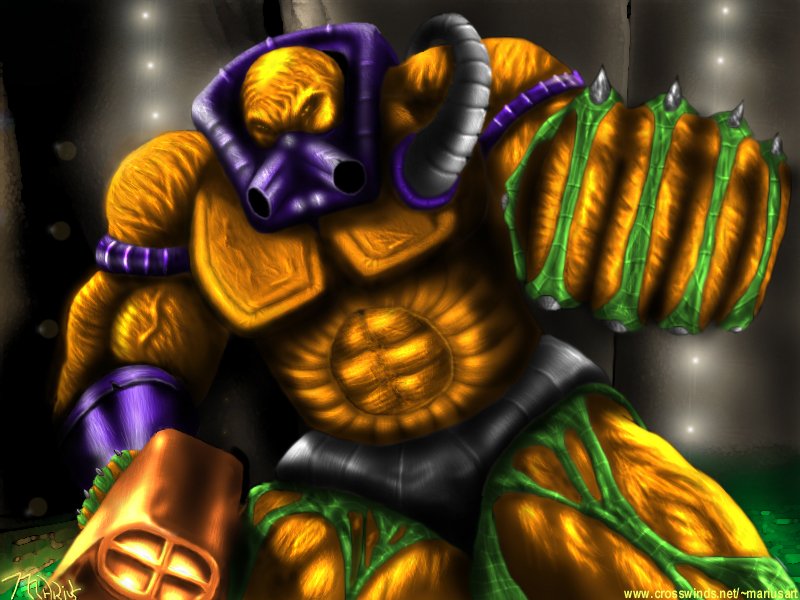
Image details
- Title: Bio Gunner
- Gallery ID: 00664
- Artist name: Marius Nita
- Posting date: 1999-08-10 (a Tuesday)
- Artist website: http://www.crosswinds.net/~mariusart
- Tags: quake2, unreal, tournament, biofreaks, aliens, monsters, paintings
- Image size: 30.01 KB
- Votes: 25
Please be sure to read the Copyright & Legal information text on the About & Help page.
Spotlight article
All right, I'll try to be as specific as possible about my drawing process... Hum... Unluckily, I didn't save too many pics as I was drawing, but I'll explain how I did it. First of all, I should tell everybody that I don't have a digital tablet or a scanner (any more...), so the whole drawing was done with the mouse=) in PhotoShop 5.
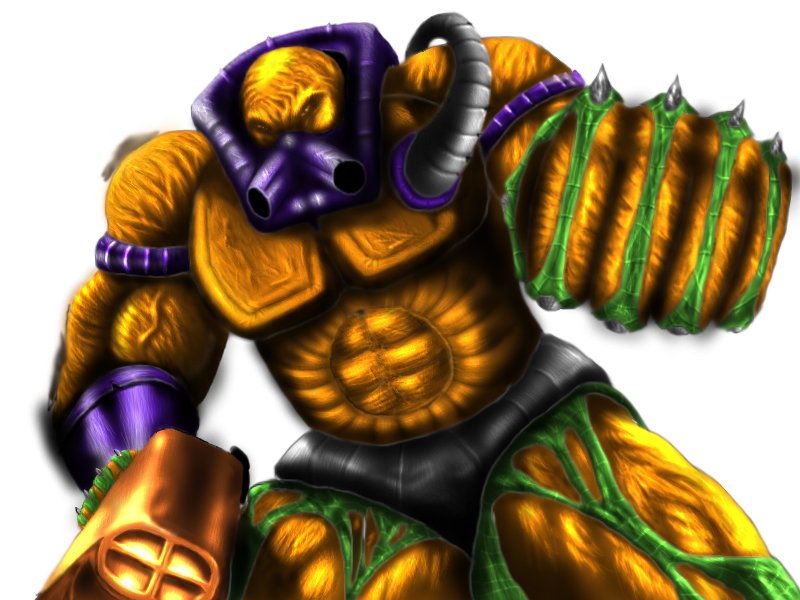
First, I draw a rough sketch on a white backround, using a small black paintbrush. This looks all messed up, and it's barely legible, because it's done with the mouse, but it gives me a clear idea of what my drawing will look like. Then, I open a new layer, choose the smallest brush, the paintbrush tool, and black for color, and I start tracing the sketch in solid lines. When I'm done, I go back to the original sketch layer and I erase everything, leaving me a clean, black line only image. After that I go back to my top layer -- that has the drawing on it -- and I colour it in with all the desired colours. I only colour my character, leaving the backround transparent, so you can see the layer below (more on that later). Then I use the magic wand tool, select a closed area, and use the Dodge/ Burn tool set on Highlights to do the shadows and highlights. When I'm done with that, I use the Smudge tool to go over all the black lines, so the drawing won't look crisp. Next step is refining: with the airbrush tool set to normal and 90% pressure and using the smallest brush, I go over the smudged edges. When doing this, I use the Pick Colour tool (press ALT while on the Airbrush) to select the edge colour. Finishing: Although my pic looks like it's done, I want to add more detail. I do that with the Dodge/Burn tool set to 20% pressure and the two smallest brushes. This is where I drew all the dents in the gloves and chest armour, the stomach muscles and arm muscle and head definition. You just lighten one area and then darken around it. It's kinda easy.=) This part takes a lot of zooming in. (about 400% in this case); And here's what I got so far:
Now, I need a backround. I decide to go with a dark metal room with green radioactive water in it. For this, I selected the layer underneath (that my original sketch was on--tricky, huh?!=)), and I basically repeated the drawing process above. I drew the lines with the line tool, coloured in, did shadows and highlights, and smudged. I didn't bother refining, since it's the backround. I drew some highlights in the water with the airbrush tool, and then used the Watercolor filter on the whole thing, so it would look blurry and rusty (or something like that). This also made the water look better. Then I selected the view tool for the top layer, I made sure that I was still on the bottom layer, and I integrated my guy in the backround, which is darkening and lightening areas depending on the influence of the character on the backround and vice-versa. This is where I added the lights on the walls, which are all done with the Lens Flare filter. My final move was to add the radioactive green fog floating on top of the water. Here's the backround:

Notice how I didn't bother with the areas behind the character, since they can't be seen in the final cut anyway. I flattened the image, and I added the last bits of detail here and there, stuff that I missed, etc.
There you have it! I named it Bio Gunner since he's a gunner (obviously) and he's in a radioactive environment.
Text written by Marius Nita for GameArt.com