GameArt Spotlight #33
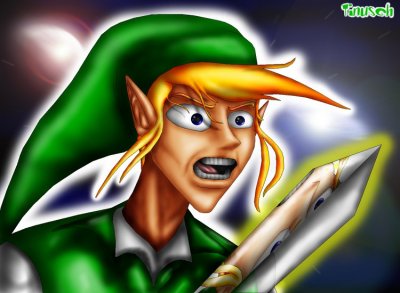
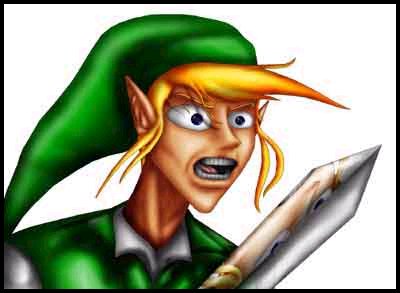
"Elven Rage" by Tinusch
Image details
- Title: Elven Rage
- Gallery ID: 00676
- Artist name: Tinusch
- Posting date: 1999-08-29 (a Sunday)
- Artist website: http://tinusch.dhs.org
- Tags: zelda, legends, ocarina, of, time, link, drawings, nintendo64, n64
- Image size: 25.81 KB
- Votes: 27
Please be sure to read the Copyright & Legal information text on the About & Help page.
Spotlight article
My style of artwork is fairly simple. I don't use any scanning, I don't work with layers, and I do it entirely with the mouse. My artwork begins as a simple sketch drawn in MSPaint. That's right, MSPaint. I think that's a great program for sketches. I use the line tool mainly for the beginning sketch, at a high resoloution, about 1500x1100.
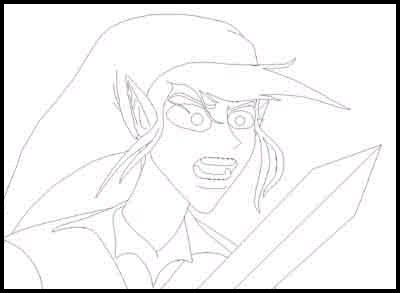
I then colored it in quickly in MSPaint.
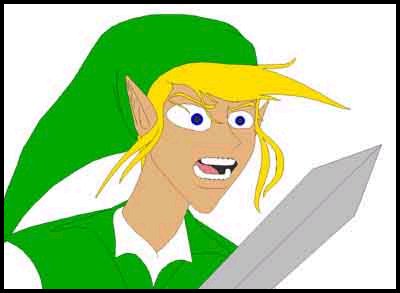
After that, I brought it into Adobe Photoshop. What I do is use the Magic Wand tool to select the area I'll be shading, so that I don't accidentally darken any areas I don't want to. Then I begin the dodging/burning process. I begin with burning lightly the basic areas of shading, then darkening and defining them. Then I dodged the light spots and shines. I usually keep my brush on about 10% exposure.
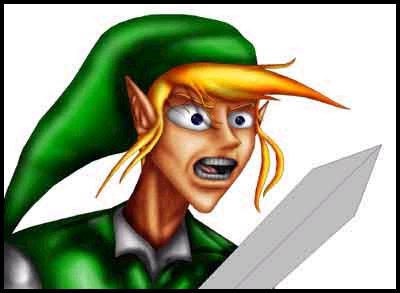
Now I had to create the reflection in the sword. This was probably the most time consuming part of the picture, since MSPaint doesn't handle large pictures very quickly, and I had to resize the picture to over 2000x2000 for the skewing process. What I basically did was I copied a section of Link's face, brought that section into MSPaint, and flipped it around. I skewed it to about a 45° angle. I then copied the sword, and made only the left side of it transparent. I pasted the sword over Link's skewed face, so that one half of the sword had a reflection. I brought the sword with the reflection on it into Adobe Photoshop, where I darkened and lightened it as necessary, creating shines and shadows, to make it actually look like a reflection on a metallic surface. For the right half of the sword, I just drew in the part of Link's shirt that you see there, shaded it, then created the shines and shadows on that side also.
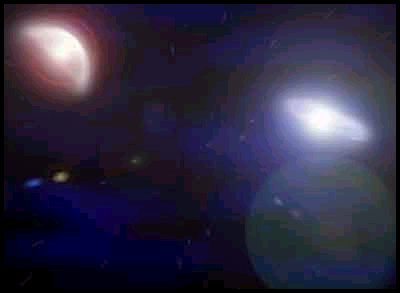
Now, I had to work on the background. This took a little while also. What I did was I made a solid black picture in Adobe Photoshop, and then, with a brush on about 10-30% opacity, drew in some blue clouds and things. You can't see it very well, but that blue/white patch just above the point of Link's sword is a touched-up photo of the Andromeda galaxy, and in the upper left-hand corner is a touched-up photo of Mars. I blurred them and created some glow around them with a large low-opacity brush. I then dotted the sky with small white stars, which were made simply with a small opaque brush in a single click. I added a 105mm Prime lens flare to the Andromeda galaxy on the right side, and a 35mm Prime lens flare to the moon on the left. My sky was now finished, but to create a sense of motion I used a radial blur on Spin mode, which made a nice effect on the stars.
I now had to combine the two pictures. I copied Link and pasted him over the sky. To make him stand out a little more, I took a size 100 brush with about 90% opacity, and made a bright white glow all around Link, and a yellow one around his sword. Since I didn't want any glow to show up on top of Link, only behind him, I then re-pasted the Link picture over the glowing one.
My picture was completed, all I had to do was resize it to about half the size it was at, which greatly reduced the pixellation and blockiness. I then signed it and sent it in. My methods aren't too complicated, but I hope I helped some people out and maybe gave them some ideas.
Text written by Tinusch for GameArt.com


