

GameArt Spotlight #43
"No Regrets" by Jon Allegrezza
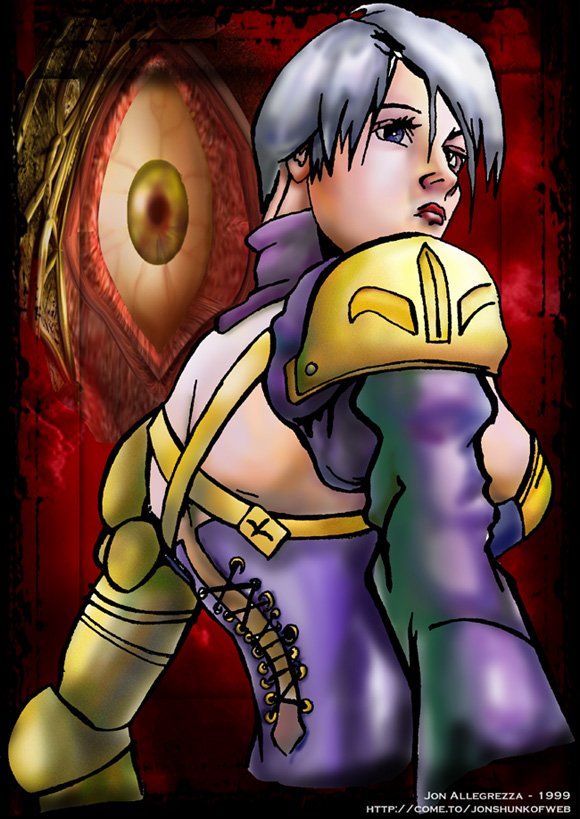
Image details
- Title: No Regrets
- Gallery ID: 00749
- Artist name: Jon Allegrezza
- Posting date: 1999-11-03 (a Wednesday)
- Artist website: http://www.tiac.net/users/heyimjon
- Tags: soul, calibur, women, girls, sexy, eyes, skins, anime, manga, paintings
- Image size: 52.22 KB
- Votes: 19
Please be sure to read the Copyright & Legal information text on the About & Help page.
Spotlight article
Thanks for taking the time out to check out my work. How it was done is not too different from most of the other digital artworks you've seen here on gameart; I'll just be giving you my bend on how I do things.
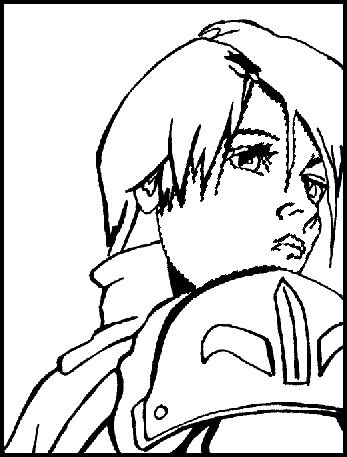
First we start out with a pencil drawing that I inked and scanned in. After scanning, in Photoshop I cranked up the brightness and contrast so it "whites out" the paper texture the scanner picked up and to further darken the lines. I now have a nice clean line drawing.
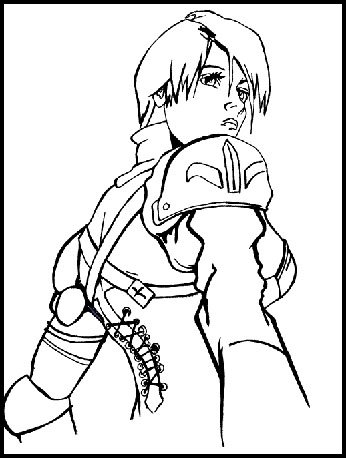
Next, I used the Magic Wand tool and, with the tolerance turned on fairly high (70), I slected all the inked-in black sections and copied it. Then I opened a new file and placed the copied linework in as a layer. From there I created a new layer called "color" and placed it one lower in the hierarchey than the line work. Next I moved back up to the linework layer and used the Magic Wand tool to select the "white" of the face.
With the white still selected, I moved back down to the "color" layer and began to paint. The selection remains no matter where in the layers hierarchy you go, only its shape stays constant. With that, I can now paint without any fear of going out of the lines. From here I broke my own cardinal rule: Never paint in Photoshop. For painting I always perfer Fractal Design Painter since color picking in Photoshop is clunky by comparison and you can manipulate the size of the brushes faster and easier in Painter. I choose to paint in PhotoShop simply because Painter has been acting funky on my machine lately with .PSD files that have layers in them. If you have Painter and its co-operating with PhotoShop then by all means use it.
Anyhow, if you've been reading other tutorials either here on gameart or on the web, you've seen a billion or so ways to paint in PhotoShop (dodge/burn tools, multiple layers of light and dark, etc). No one way is right or wrong, so long as it gets the job done. I just choose to paint in a more traditional way of building on my darks with different shades and colors (sorta like the multiple layers techniques except its all on one layer). After a couple of hours of bouncing between the linework and color layer as described above and painting, it is complete. The only other effect added (and its hardly noticable) was a grain texture added to the yellow armor pieces so it would not have the same texture look as the skin.
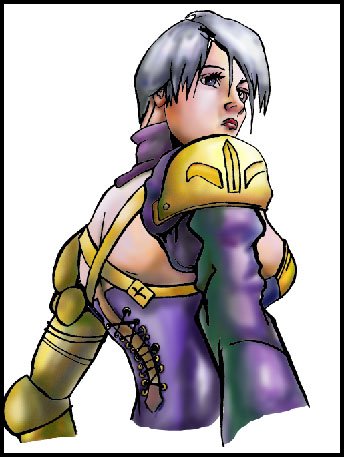
Ok, the long part is over. The background was easy. First I flattened the image, used the Magic Wand to select the white around I've and inverted it to select her. I copy and pasted her into a new file. I chose a sky background from a stock photo CD and turned into to a grayscale. I then re-converted it back to RGB color so it will accept color again and applied a 50% red color Fill over it. I copy and pasted this image into my new file and applied Auto F/X's Photo/Graphic Edges filter to it. I felt the corner needed something so I snagged the Soul Edge eye (done in 3D Studio Max) I used in a previous pic The Sword Is My Shepard and placed it in to help fill out the negative space.
That's pretty much all there was to it. No new or exciting technique was discovered here, but in the end, if what you do creates art, then where's the problem? Best of luck in all your endevours and again thanks for checking me out.
Text written by Jon Allegrezza for GameArt.com