

GameArt Spotlight #51
"Soul of the Samurai" by Corey Pelton
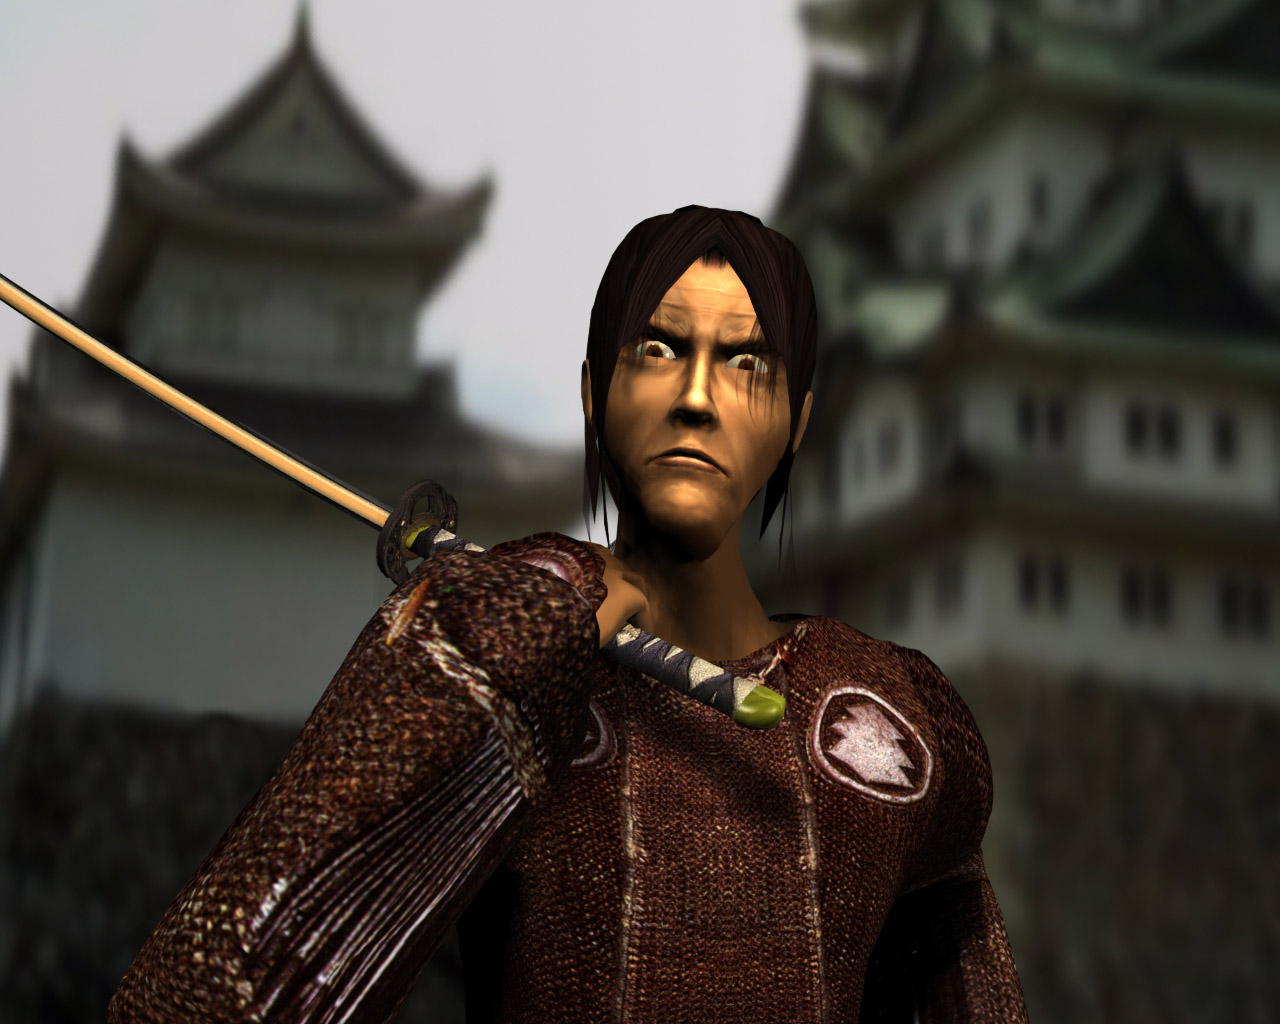
Image details
- Title: Soul of the Samurai
- Gallery ID: 00841
- Artist name: Corey Pelton
- Posting date: 2000-02-21 (a Monday)
- Artist website: http://www.lucidesignz.com
- Tags: soul, calibur, brave, fencer, musashi, toshiro, Mifune, musashi, miyamoto, manga, anime, japanese, sf2, karate, dreamcast
- Image size: 21.42 KB
- Votes: 40
Please be sure to read the Copyright & Legal information text on the About & Help page.
Spotlight article
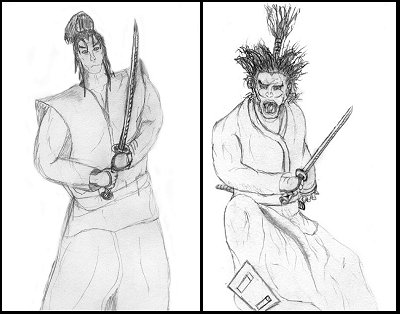
Well, this is a character I've been working on for my demo reel. He's based on the legendary Miyamoto Musashi and modeled after the great Toshiro Mifune, which is Namco's own influence for Mitsurugi of Soul Calibur fame. He began as a few sketches (bad sketches as you can see) and I've been refining and changing him ever since.
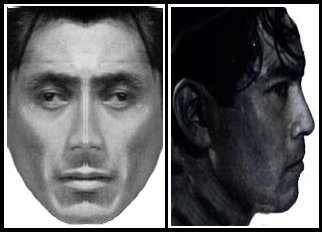
First I searched the web for reference photos for modeling. The pics I found weren't the greatest so I took them into Photoshop for editing. The front of Mifune-san's face was not totally facing the camera so to make it symetrical I cut it in half, copied the good half, pasted it back in and flipped it horizontally so that it gave me a decent headon shot of his face. I also used this as the basis for his texture map. The profile shot was fairly simple. I cut out what I needed and rotated and scaled it so that it lined up close to the front of the face. Now I had my rotoscopes for the face.
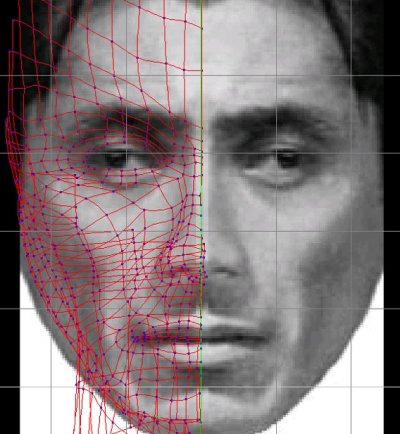
I began modeling in my main modeling software Hash Animation Master. I rotoscoped the front and side view of the pictures of the face. I started by laying out my splines over the front image in my front viewport. I just followed the contours of the face until I got a flat grid of patches for half of the face. I then switched to my left viewport and pulled out the verticies until they matched the profile rotoscope.
After tweaking out the mesh I added the back of the head. Once I had the entire half done I mirrored the half and connected them. Then for the body I used reference pictures from, 'Figure Drawing for All It's Worth' By Andrew Loomis. I used the same method as I did for the face. I only modeled what I needed of the body since the other parts would never be seen. Once his head and body were finished I imported him into Maya.
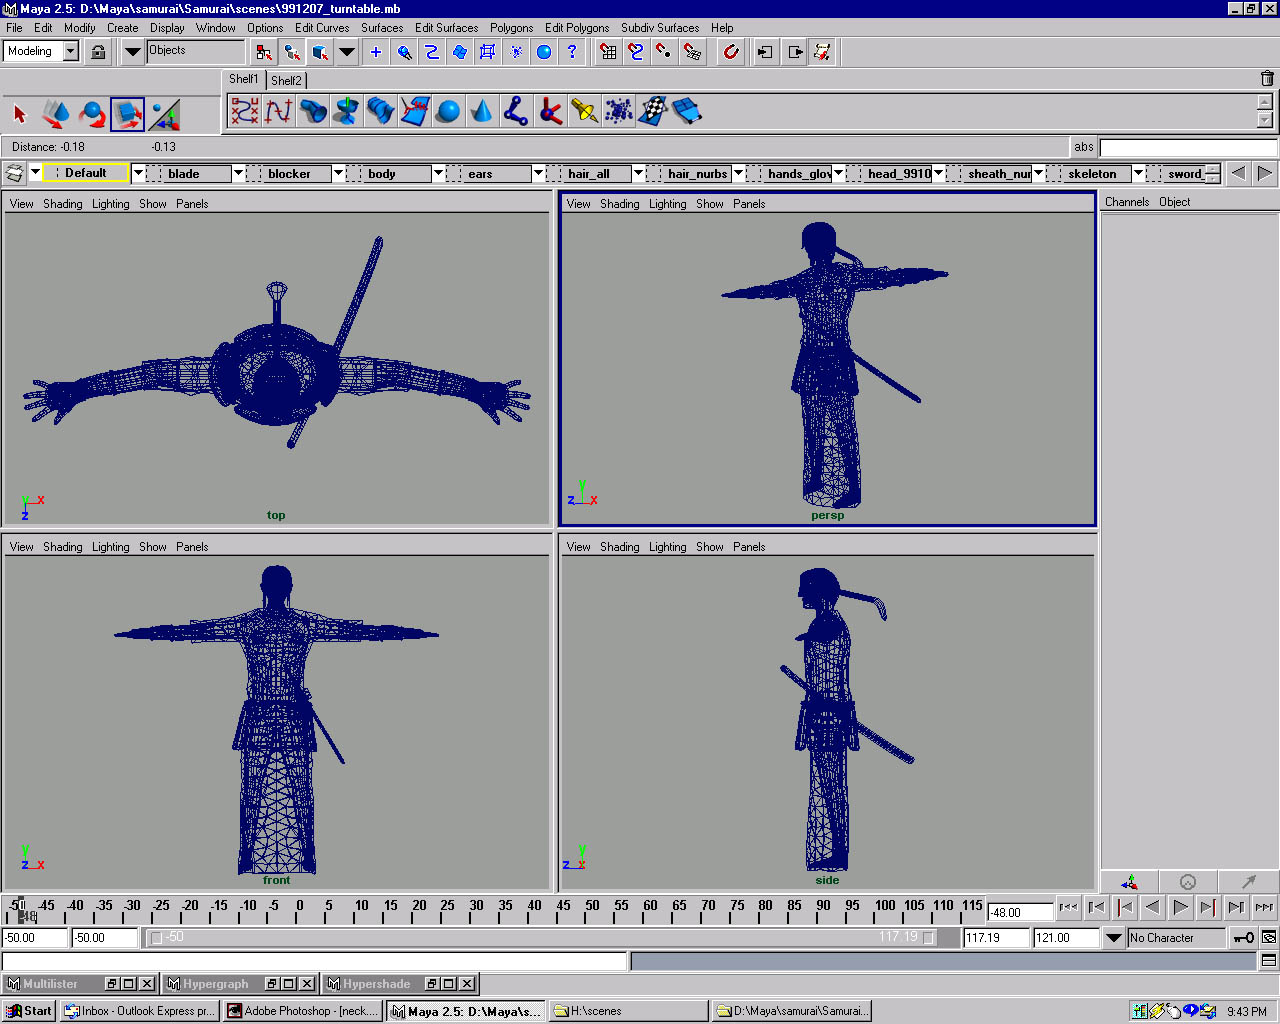
Once in Maya I textured him using textures I created or edited from scans in Photoshop. I then dressed him with Maya Cloth, built his skeleton and posed him.
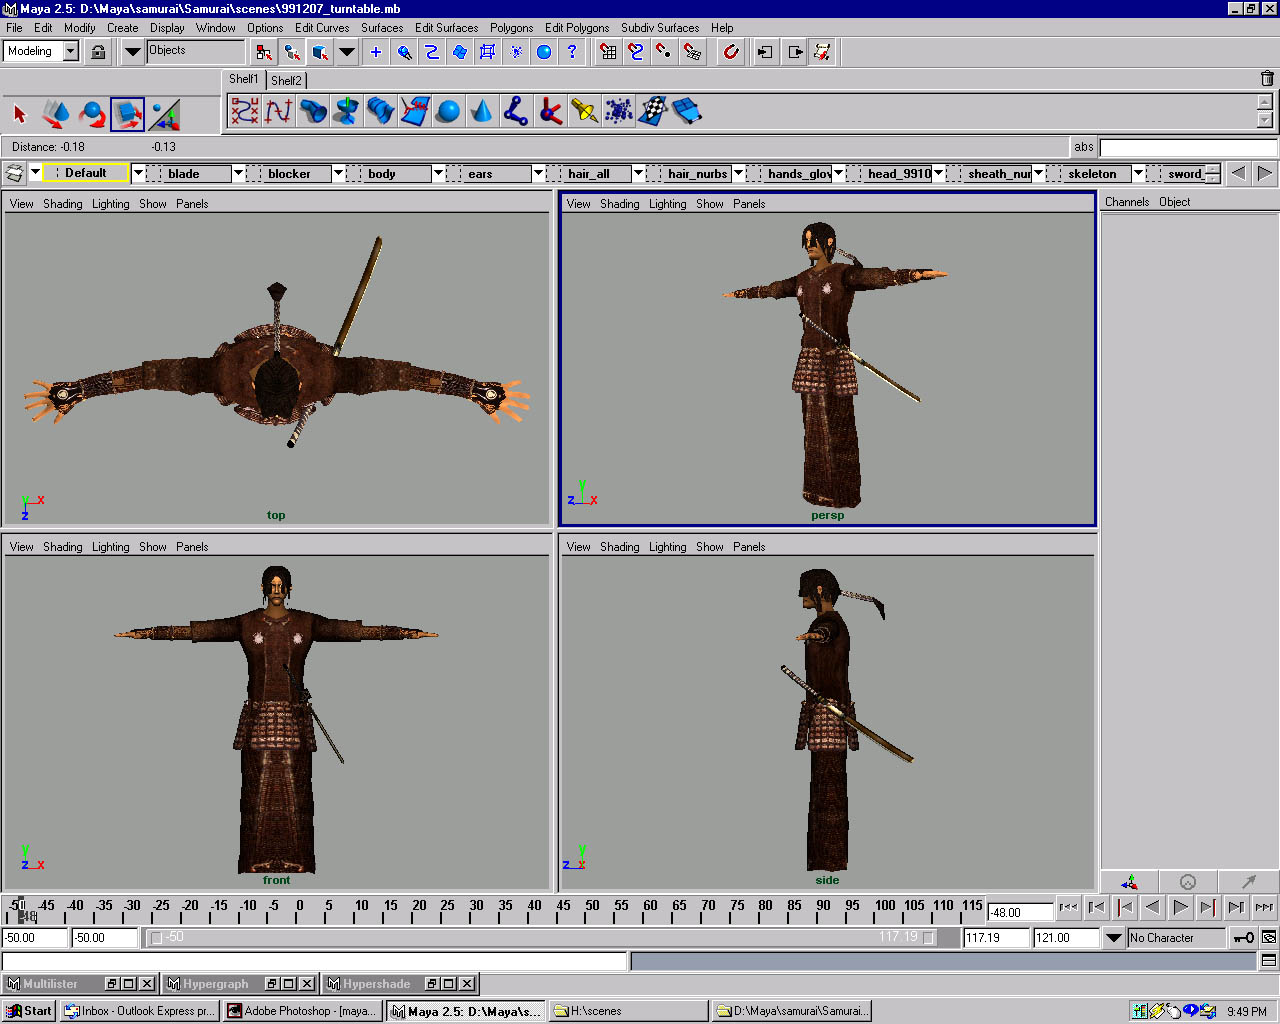
The background is a pic of Nagoya Castle in Japan and was composited in Photoshop. I added a blur to give it depth of field, but I think I over did it a bit ;)
I'm in the midst of remodeling him again so he actually looks a bit different now. A more up to date version of him can be seen in the gallery section at my website, along with my other works.
Text written by Corey Pelton for GameArt.com