

GameArt Spotlight #68
"Joe King in the Amazon Temple" by Reeltv
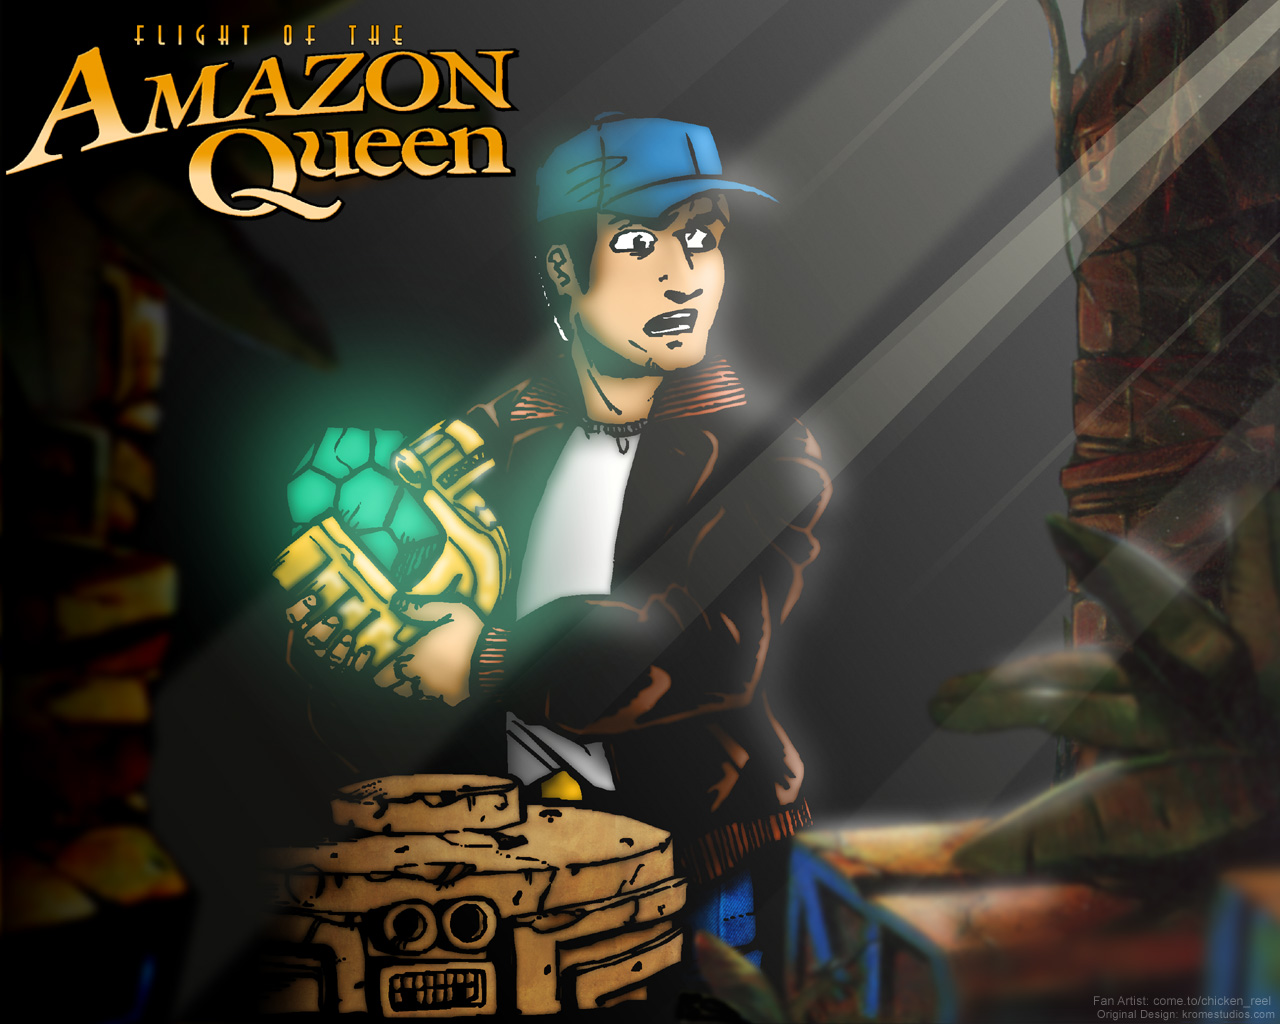
Image details
- Title: Joe King in the Amazon Temple
- Gallery ID: 00947
- Artist name: Reeltv
- Posting date: 2000-07-19 (a Wednesday)
- Artist website: http://come.to/chicken_reel
- Tags: Flight, of, the, Amazon, Queen, adventures, monkey, island, indiana, jones, rpg, puzzles, paintings, scenes
- Image size: 25.79 KB
- Votes: 17
Please be sure to read the Copyright & Legal information text on the About & Help page.
Spotlight article
I am not much of a drawer but I do like to touch up images by adding effects and stuff. The original drawing I used was from the Flight of the Amazon Queen (Don't let the name turn you off its not about drag queens but a secret tribe of Amazon woman) Official playing guide. This book is full of artwork not in the game that looks like they where printed at 72 DPI or less.
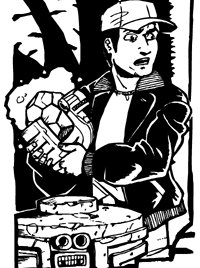
First off I scanned the images in at 400 DPI. Big is good it gives the computer more to work with when it victories the image. However 400 is very high 200 or 300 is fine. With my UMAX scanner I scanner the image with the B/W Document mode however some scanners have a line art more that does the same thing. Now that I got the image I save it as a tiff and bring it in to Adobe Streamline 4.0 to victories the image. When I am happy with the job Streamline has done, I get Illustrator 8.0 to save the vector image back to a tiff or a psd. To make it easy to colour the image I save the tiff or psd with anti-alias off. Latter when the image is reseized to some thing more useable for a desktop image PhotoShop will anti-alias the image during the down sizing. (When you do resizes a multi layered image like this one flatten the image first to stop the layers from getting odd out lines around them.)
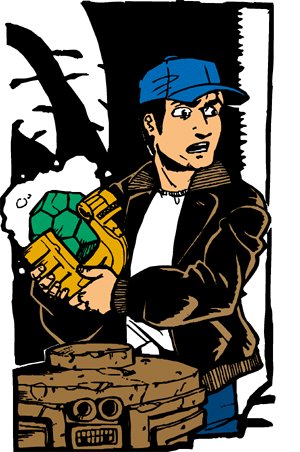
This is the easy part I use the magic wand tool to select the areas I wont to fill with base colours.
Here is the fun bit adding the shading to Joe. For example I walk you threw what I did for the skin. First select all the bases colours that make up the skin, now duplicate that layer. You should now have two identical layers of the base skin colour. Working now in the duplicate layer uses the wand tool to select all the elements of this layer.
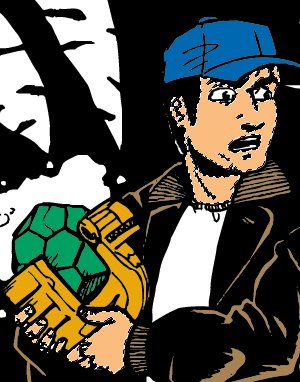
Go to the quick mask mode and invert the image so every thing bar the base colour is picked. Now fill the new selected area in with black.

With this done unselected any thing this is still highlighted and uses the gaussian blur to lightly blur the base colour and the black around it together. Don't blur it too much just make it a little fuzzy.
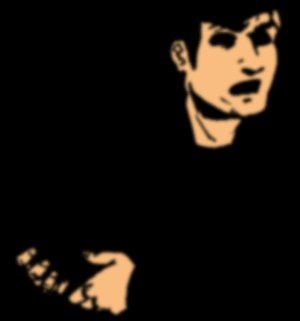
With this done uses the burn tool to darken the image where areas are in shadow. All so use the dodge tool to add highlight. Now gaussian blur it a little bit more (I say a little as in tiny tweaks). Now go back to the original layer that has the base skin colour and select it all with the wand and go to the quick mask mode and invert it. Select the duplicate layer we where just blurring and press the delete key. This will get rid of all the black we don't need any more. Now set the duplicate layer to luminosity and tweak its opacity to your likings. Do this for all your base colours and the image will look like some thing like this.
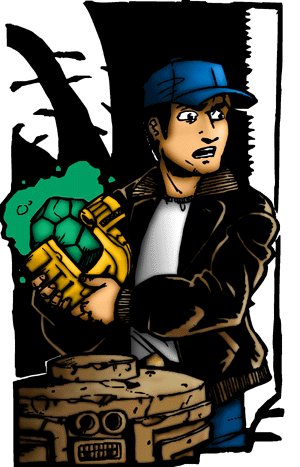
This was the fun (well I find it fun) and all so the time consuming part. Now I will lightly explain some of the other effects as they're not that hard. To make the glow I drew a white line with the pencil tool on a new layer and then gaussian blurred it and tweaked it's opacity. Bold strong lines need more blur thus giving a stronger glow. Use smaller lines to get a glow seen on the plant and rock at the bottom right of the image.
The beams of light where made with a polygonal lasso selection filled with a linear gradient fill of a yellowy white. The trick with the light beams is to get their opacity and composition right. Get them right and all falls in to place. All so if you zoom in a bit you can see that I scanned a pear of my jeans in and used them as a texture for Joe's jeans. All so I used a rocky texture for the platform for the ideal. The walls I used to frame the image where taken from of the manual and gaussian blurred to give depth.
Well that's all I got to say hoped this helped.
Text written by Reeltv for GameArt.com