

GameArt Spotlight #80
"Cold Blood" by Michael Mik Fallik
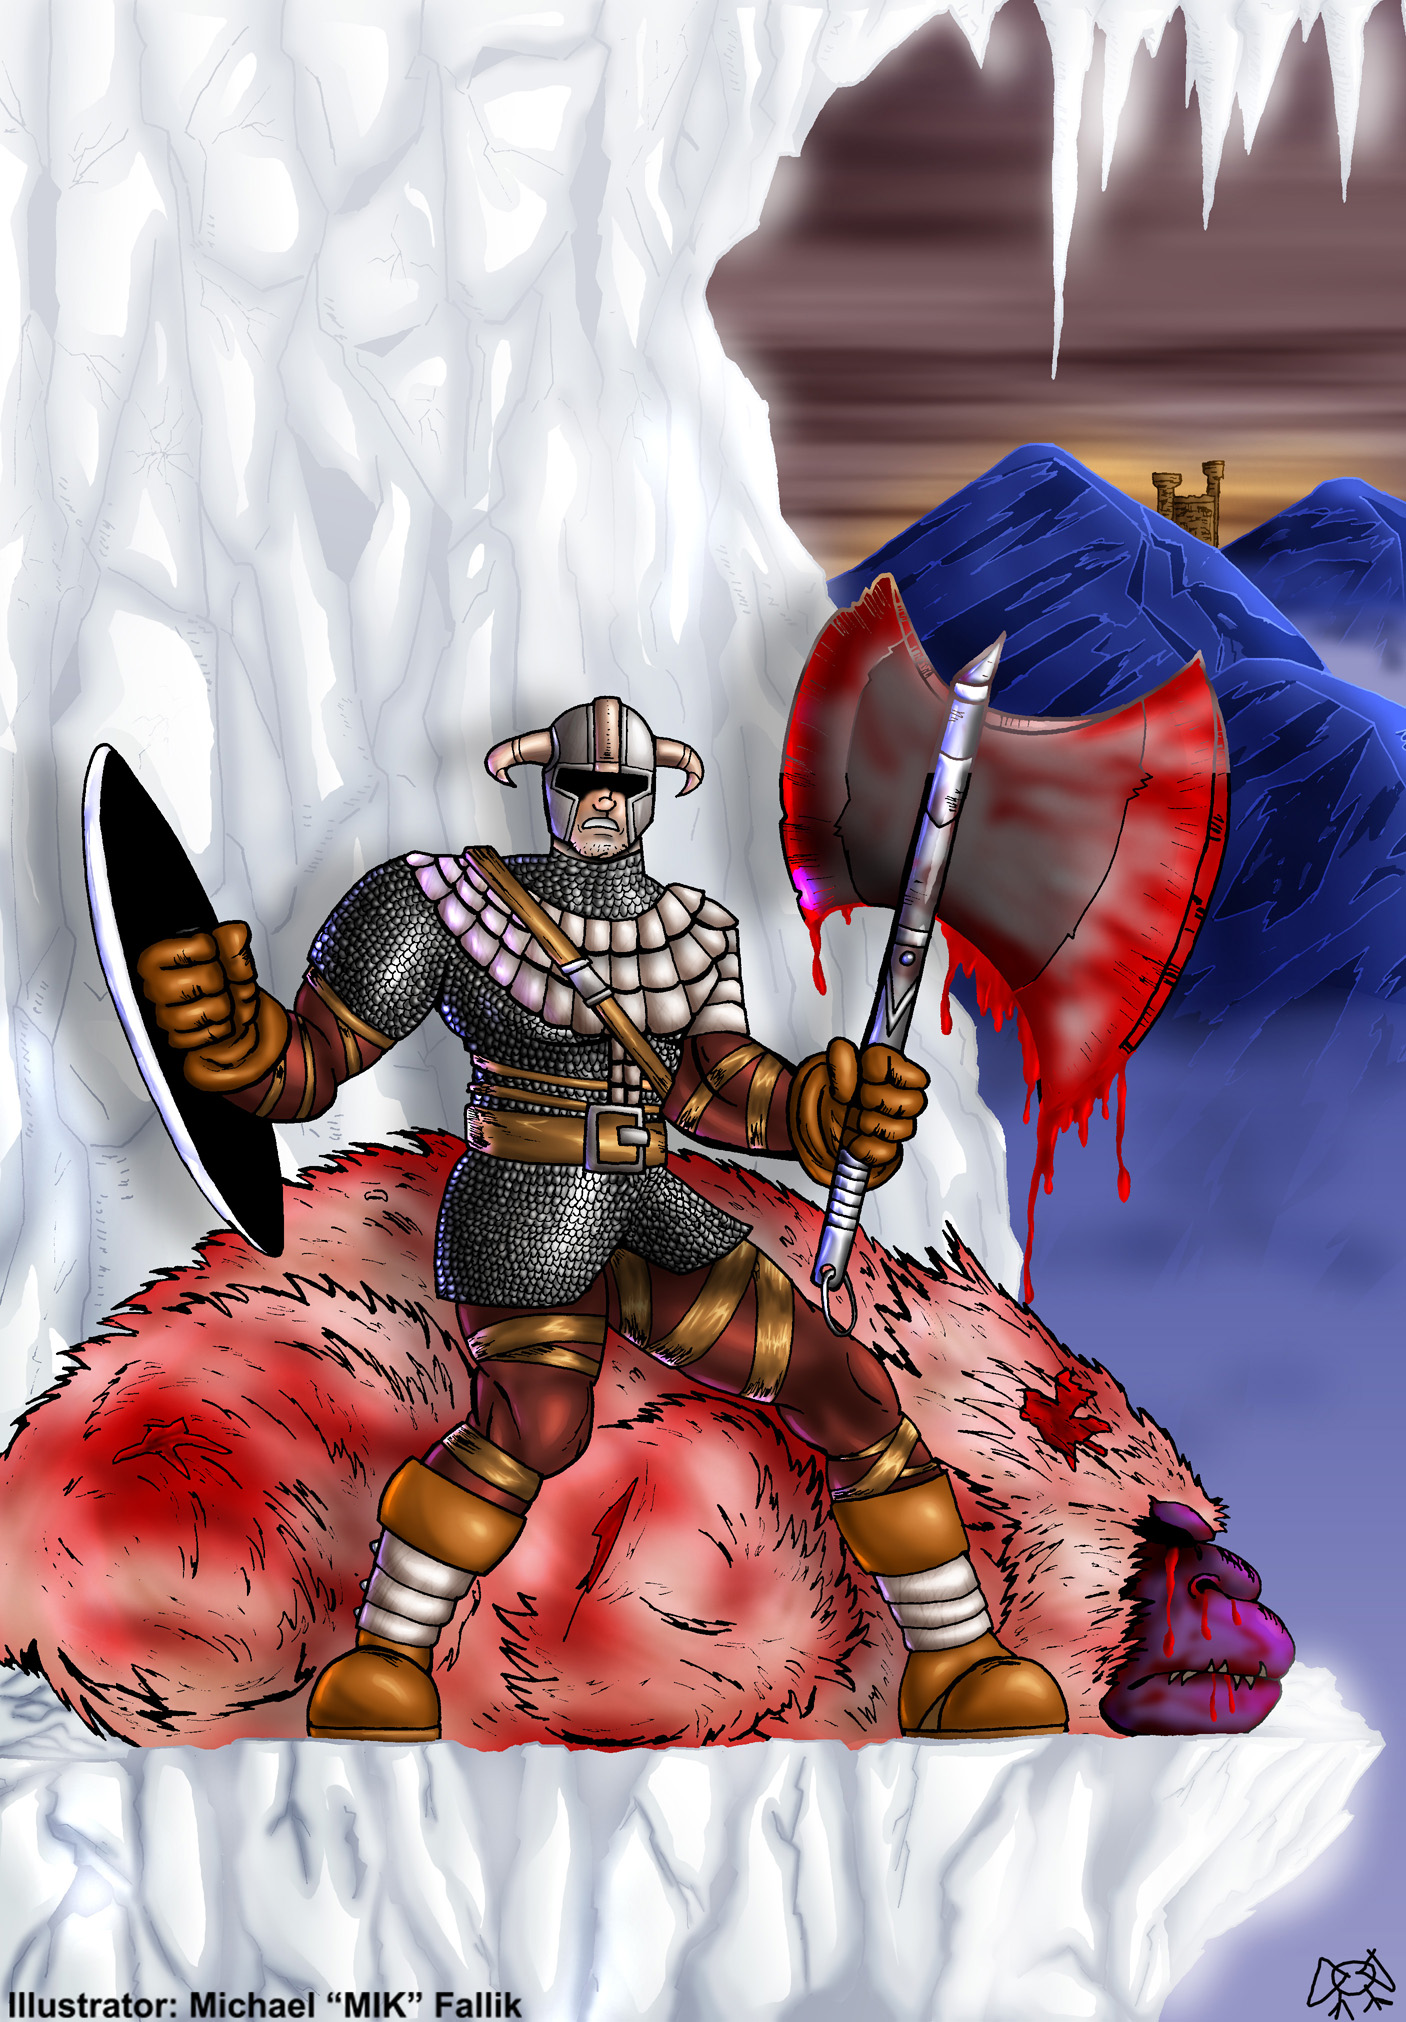
Image details
- Title: Cold Blood
- Gallery ID: 01025
- Artist name: Michael Mik Fallik
- Posting date: 2000-10-10 (a Tuesday)
- Artist website: Unknown
- Tags: rune, human, head, god, gathering, of, developers, ice, winter, cold, paintings, axes, monsters, shields, warriors
- Image size: 60.72 KB
- Votes: 26
Please be sure to read the Copyright & Legal information text on the About & Help page.
Spotlight article
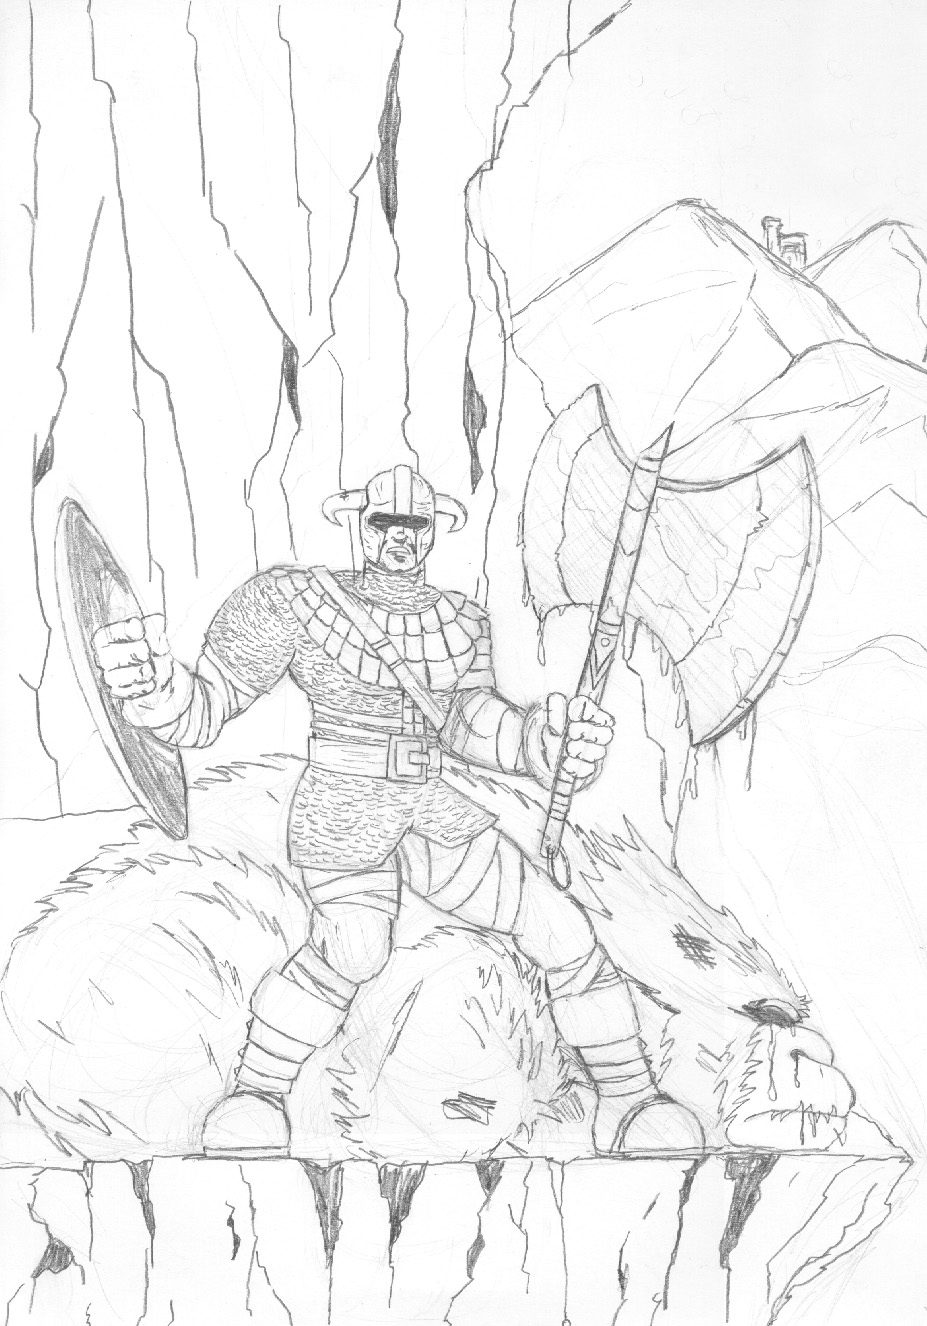
So, where do I start? Ah yes, the idea. The idea for this picture was taken from some preview videos I saw demonstrating the amazing shadow system in Rune. I started out penciling the rough sketch with a 2H pencil. Then I went over the sketch and tightened the picture with a 2B pencil. I don't like to add too much detail to the sketch. I usually leave that to the inking part (so it won't be "just tracing"). All in all my penciling is pretty standard stuff.
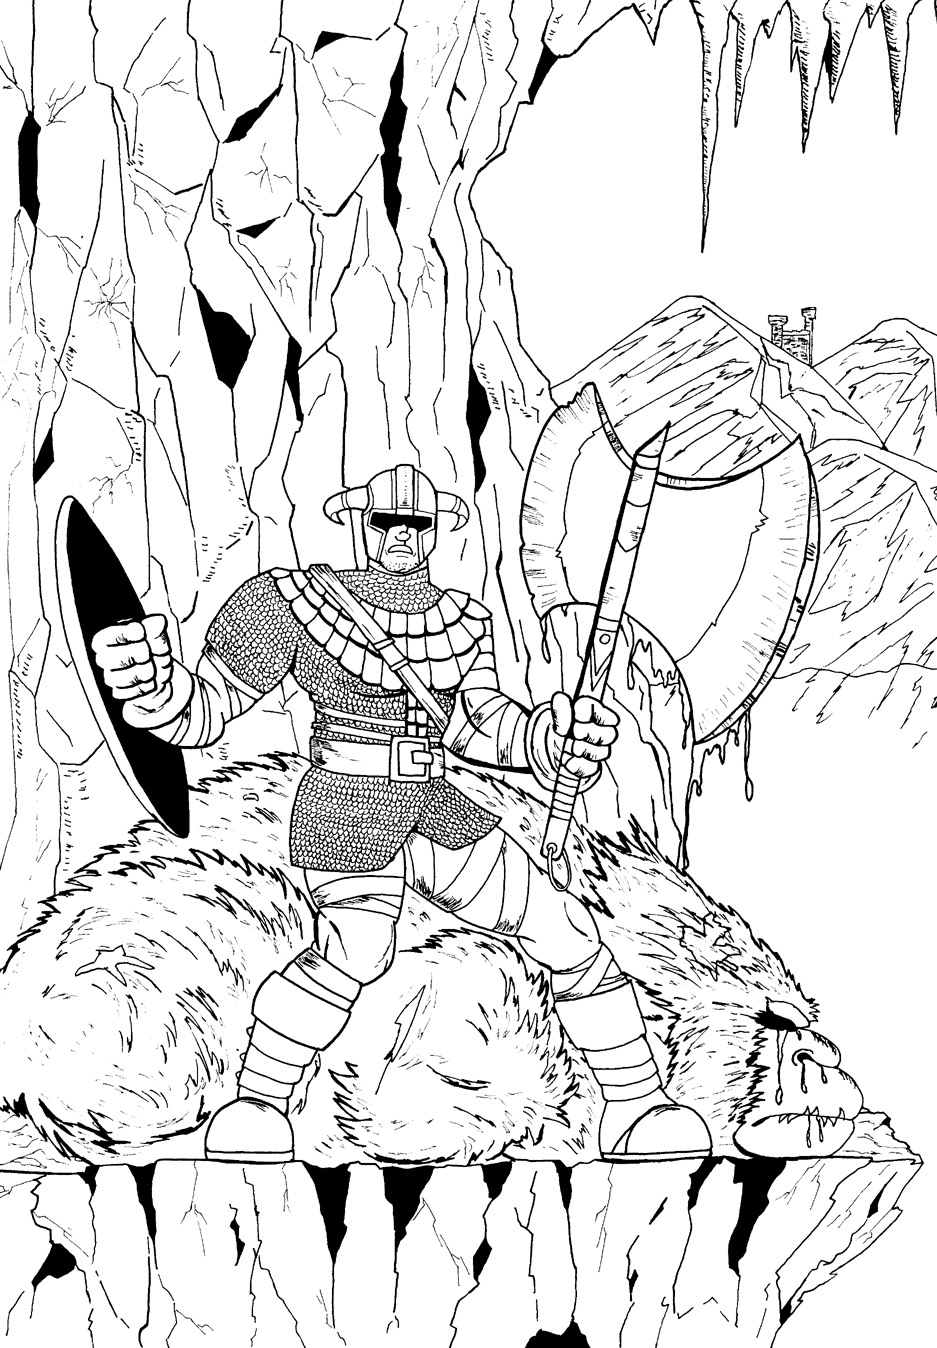
At this point I was pretty unhappy with this picture. So I left it too rot under my desk. About a week later, I bought some new rapidographs (special pens architects use), I decided to try them out, and the Rune picture was already penciled so I said "what the hell". The rapidographs I used are made by Staedtler, they are one use only and do not need any cleaning like normal rapidographs do. Most of this picture was inked with a 0.4 tip, as I inked objects that I were closer to the viewer (such as Ragnar's hands and his axe) I used thicker tips (0.6 and 10 which is really thick). For little details such as the scales and cracks in the ice I used a 0.3 and 0.05 tip (which is as thin as the needle I use to inject my precious heroin). The inking process took about 3 hours (mainly because the scales on Ragnar's armor). I also experimented a lot with these new rapidographs and I can honestly say I never had so much fun inking a picture as much as I did this one (I never had any fun inking any picture at all).
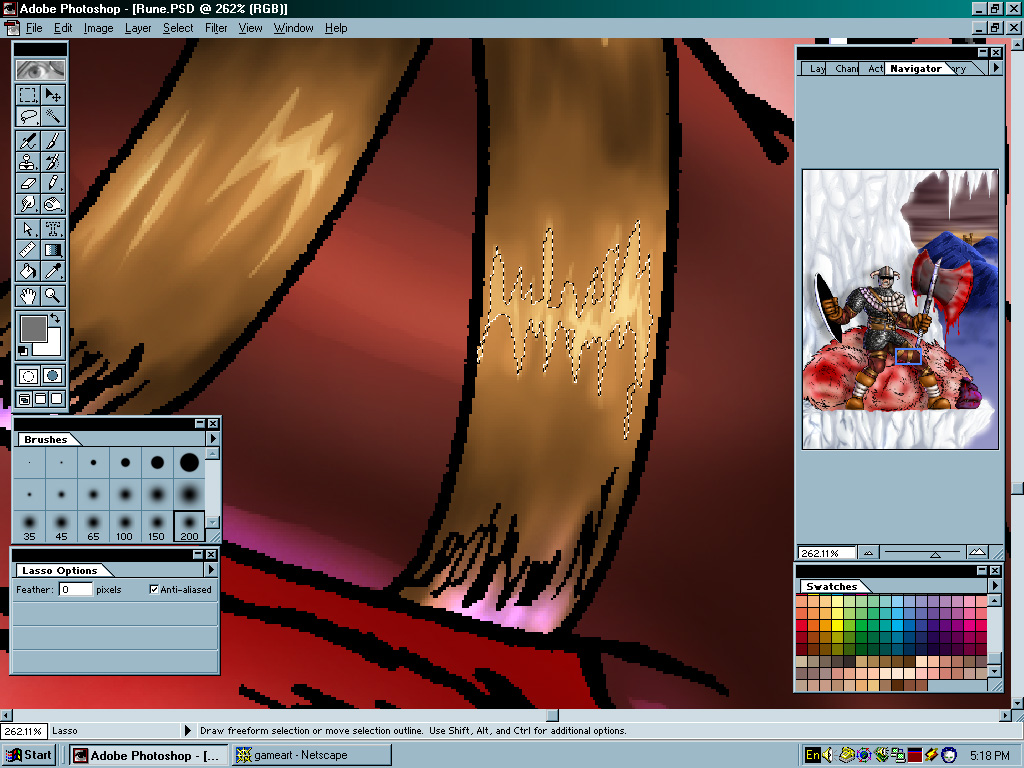
Needles to say I was very pleased with the way the inked picture turned out, and I couldn't wait to color it. The next day I scanned the picture in (you can check my scanning tutorial here at Game Art to see how it was done). And then prepared the picture for coloring. First step was laying out the flats. This is pretty much a straightforward process of just using the "Paint Bucket Tool" to fill out the white areas. After that, I did some color separations, basically I colored all the black lines of the ice in blue, and the lines of the blood in red. This was done by copying all the lines to a new layer, switching on the "Preserve Transparency" (PT) and coloring the lines with a big pencil brush. Next comes the fun part, I flattened the image and started the shading. For shading I copy the part I wish to shade to a new layer, turn on PT and use the air brush at 10% opacity using either lighter colors with Screen, to do lights. And Darker colors with Multiply for the shadows. The metals in the picture (the axe, and armor) were done only with the black and white colors, with white being from where the light comes from and black being for the shadows. Each scale on Ragnar's armor was shaded separately, and then the whole armor was shaded together as one piece. Lastly I added a second blue light source coming from the Ragnar's back, to give the picture a more 3d look.
After all that was done, I went forward to add "cuts" to the picture. Cuts add a shiny surface to the picture and bring on a whole new dimension. Cuts are done buy using the lasso tool to select a bright part in the picture and then coloring in side that part with the airbrush using screen and a very bright color. Pressure of the airbrush varies depending on the part. For instance: I would use a very low-pressured airbrush on Ragnar's face or a very high-pressured airbrush for the Ice in the background.
That's about it for this spotlight, if you have any other questions, comments or complaints, drop me word. All in all I'm very happy with how this picture turned out. It took me about two weeks on and off (mostly off) to finish. Now if you excuse me I'm gonna fill my 0.05 rapidographs with some of the good stuff.
Text written by Michael Mik Fallik for GameArt.com