

GameArt Spotlight #97
"Lara Croft" by Brad Dismukes

Image details
- Title: Lara Croft
- Gallery ID: 01256
- Artist name: Brad Dismukes
- Posting date: 2002-02-26 (a Tuesday)
- Artist website: http://www.excelsiorstudios.com
- Tags: Tombraider, Lara, Croft, girls, women, sexy, naked, flesh, legs
- Image size: 37.66 KB
- Votes: 20
Please be sure to read the Copyright & Legal information text on the About & Help page.
Spotlight article
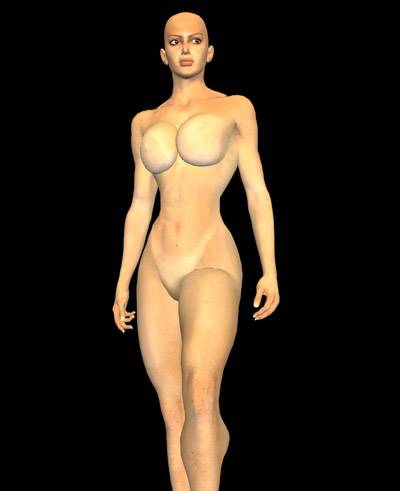
I started with a figure created in Poser 4. I spent many hours adjusting and adding morph targets to create what I thought looked like the character and then spent an entire day just setting the pose. I rendered the image in several passes. This first pass was for skin tones and was rendered without shadows.
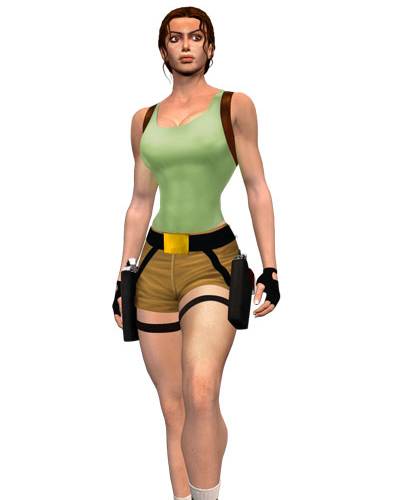
Once the render is complete, it was very high res, I opened it in Photoshop. Heavy use of the path tool was required to generate the shapes of the clothes and to clean up the visible polygons along the edges, especially the shoulders. Each element, clothes, hair, belt, hair, etc., was on its own layer with preserve transparency turned on to keep the edges from degenerating into aliased messes. At this point, there are 44 active layers. I added some shading to the clothes with the airbrush and smudge tools and made my own 3D belt buckle. The guns came from Renderosity.com and the socks are real which I shot with a digital camera.
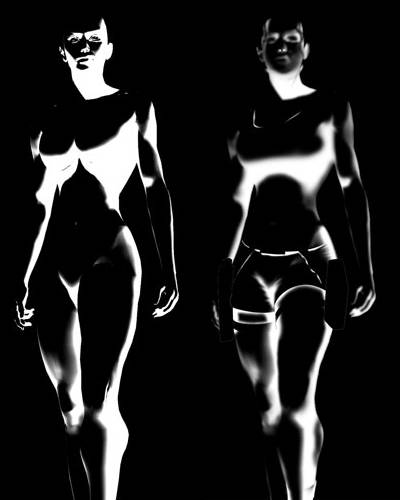
Back in Poser, I removed all the textures and set the figure colors to white. Having a vague memory of where the sun was in the background image, I set up one light at what looked like the right angle with the shadow option turned on and set to the highest resolution. Once in Photoshop, the image was inverted to get this:
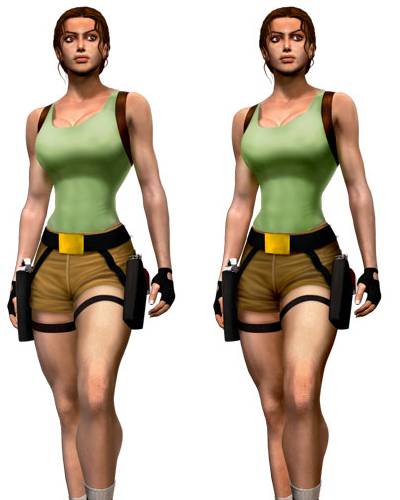
It was loaded into a Levels Adjustment Layer and retouched to conform to the contours of the clothing. Adjusting the levels effects the image behind it without altering it, so painting shadows and highlights like this allows me to go back and change anything that may not have worked as well as I might have liked.
After another pass in Poser for some ambiant shadows and a few more Adjusrment Layers, the shadows are completed.
I know it looks like a mistake, but this is what the Adjustment Layer for the highlights ended up looking like.

I figured she is in the jungle and things are steamy so one more pass in Poser give me a reflection map which was also heavily retouched in Photoshop... Applied over the other layers using the Screen Transfer mode and look, she's glossy.

After flattening the file, I opened it in a new file and adjusted the levels and color balance to match the tones of the background, which I shot while in South Africa last November. An amazing trip that I can not recommend highly enough.
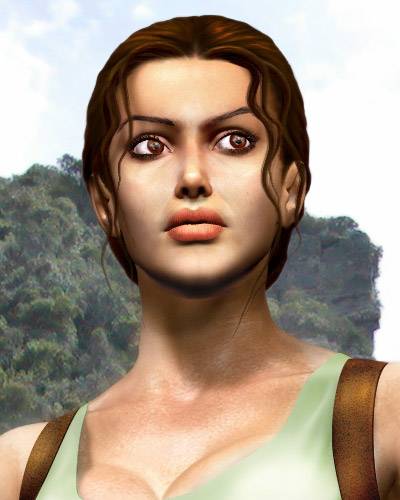
A close up of the final image for greater detail. The actual size is 1620 x 2135 pixels, 62 layers, 10 alpha channels and 47.3 megs of disk space. Not to mention the nearly 60 hours of fun and exceitment spent painting, rendering and tweaking. I'm sure I'm working on a new one as you are reading this.
Text written by Brad Dismukes for GameArt.com